If you've ever found yourself tangled in the art of grilling or smoking, you'd know that your choice of charcoal can greatly influence the taste and quality of your grub. Lumpwood charcoal emerges as a fine choice, being a pure wood product that burns with more intensity than its counterpart - briquettes.
Lumpwood charcoal leaves behind minimal ash, hence bestowing a cleaner, unadulterated flavour upon your food. When you're out shopping for lumpwood charcoal, make it a point to seek out top-notch options that steer clear of additives or harsh chemicals.
Keep an eye out for brands that derive their products from sustainably sourced hardwoods, such as oak, hickory, or maple. It would be best if you gave a wide berth to budget options that utilise scrap wood or include fillers such as sawdust or coal. These can give rise to harmful chemicals when lit and mar the flavour of your food.
Once you have chosen the right lumpwood charcoal for your BBQ endeavours, it's paramount to prep it correctly before setting it aflame. This involves strategically arranging the charcoal and employing techniques that maintain uniform heat distribution and stable temperatures throughout your cooking journey. Up next, we will delve into some fundamental tips for prepping your charcoal before lighting it.
Introduction
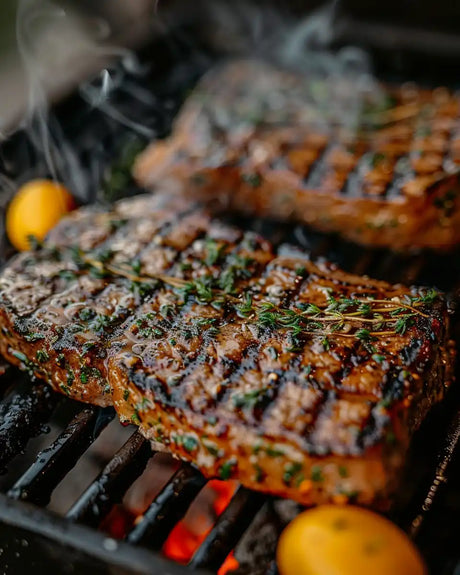
Barbecuing provides a splendid avenue to whip up a feast outdoors whilst enjoying the company of friends and family. Whether you're a fledgeling grillmaster or a seasoned pitmaster, correctly lighting lumpwood charcoal is the secret sauce to BBQ perfection.
Lumpwood charcoal, made from 100% hardwood, imparts a naturally smoky flavour that elevates the taste of your grilled dishes. It also generates less ash than briquettes, making it a choice pick. In this guide, we will walk you through the pivotal steps of lighting lumpwood charcoal to ensure a top-tier BBQ experience.
Explanation of Lumpwood Charcoal
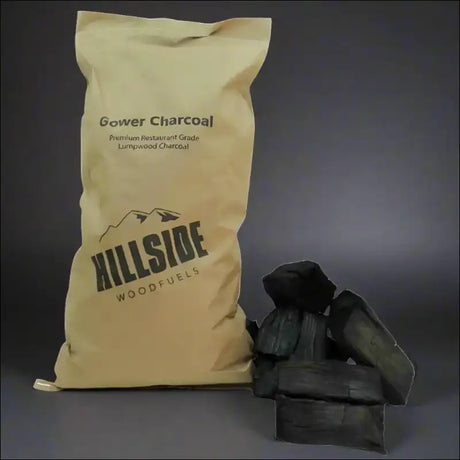
Lumpwood charcoal is essentially wood that has undergone a process known as pyrolysis, where it is burnt in the absence of oxygen to transform into coal. Its all-natural composition, free of any chemicals or additives, makes it an ideal candidate for grilling food.
This procedure retains the original shape and texture of the wood, resulting in the final product bearing a resemblance to black, irregularly-shaped lumps of various sizes. Due to its denser structure, lumpwood burns with more intensity than briquettes, and it also produces a minimal amount of ash.
The Importance of Proper Lighting Techniques
The art of correctly lighting lumpwood charcoal plays a crucial role in determining the ultimate quality of your BBQ dishes. Mastering this skill allows you to regulate temperature levels effectively, which has a profound impact on various aspects such as cooking time, flavour development, and the texture of the meat. Additionally, proper lighting techniques also serve as a safety measure, as mishandling can lead to dangerous fires or explosions, putting you at risk of accidents or injuries during your culinary adventure.
Outline of the Steps Involved
Lighting lumpwood charcoal for your BBQ requires adherence to several key steps to ensure a successful cookout. These include: choosing the right type of lumpwood charcoal; arranging the charcoal in a pyramid formation; utilising lighter fluid or fire starters; employing natural ignition methods such as newspapers or kindling; using electric starters; monitoring heat levels by familiarising yourself with the different heat zones of your grill; maintaining optimal moisture levels with the help of water pans or spritz bottles; among others. By diligently following these steps, you'll find yourself adept at lighting lumpwood charcoal and producing exceptional BBQ dishes.
Preparing the Charcoal
Choosing the Right Type of Lumpwood Charcoal
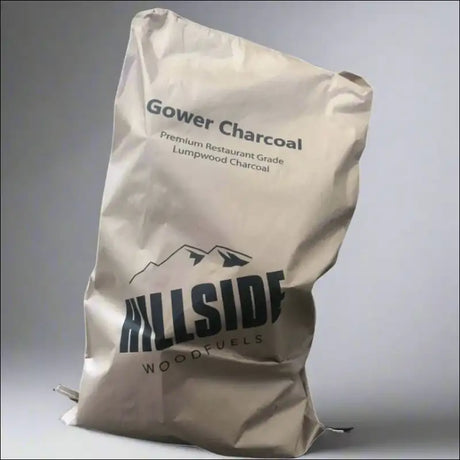
Remember, all lumpwood charcoals are not created equal, and the type you choose can have a substantial influence on your BBQ's outcomes. Opt for charcoal derived from dense hardwoods such as oak, hickory, or mesquite, as these varieties burn with greater intensity and longevity. Steer clear of those containing fillers like sawdust or scrap wood as they can taint the flavour and reduce burn duration. Also, you need to decide between using standard or restaurant-grade lumpwood charcoal. While the standard variety is well-suited for casual backyard grilling, restaurant-grade charcoal is designed to withstand high-heat cooking conditions prevalent in commercial kitchens. Though more expensive, restaurant-grade charcoal burns hotter and lasts longer.
Arranging the Charcoal in a Pyramid Formation
It's important to arrange your charcoal in a pyramid shape to facilitate free air circulation and optimal heat distribution. Skimping on the charcoal could lead to inconsistent cooking temperatures, whereas an excess could make heat control challenging. Begin by laying two or three handfuls of crumpled newspaper at the base of your grill or chimney starter. Following this, stack enough charcoal to form a small pyramid atop the newspaper. Ensure that the coals are not packed too closely together; leave spaces in between for air to flow through.
Using a Chimney Starter to Ignite the Charcoal
A chimney starter is a highly efficient tool for lighting your lumpwood charcoal quickly and without the need for any chemicals. Load your grill with the required amount of charcoal for your BBQ session, and place two or three sheets of crumpled newspaper beneath it on a fire-resistant surface. Ignite the paper using a long matchstick, lighter stick or an electric starter, until flames become visible at the base where you've placed the newspaper. Allow it to sit undisturbed until flames start emanating from the chimney's top, signifying that the coals are adequately lit (this usually takes about 15-20 minutes). Carefully tip the hot coals onto the bottom grill grate using heat-resistant gloves or tongs. Spread them evenly and wait for them to turn ashy before you start cooking.
Lighting Techniques
Using Lighter Fluid or Fire Starters
If you're using lumpwood charcoal for your BBQ, you might want to consider using lighter fluid or fire starters to ignite the charcoal, especially when you're aiming for a quick start. When opting for lighter fluid, dribble a modest quantity on top of the pyramid of charcoal before igniting it.
Exercising caution with the amount of lighter fluid is essential as an excess could lead to sudden flare-ups and potentially hazardous situations. Roughly, a quarter cup of lighter fluid per pound of lumpwood charcoal suffices. For optimal results, pour the lighter fluid in a line over the top layer of coals instead of concentrating it in one spot. This strategy helps prevent flare-ups and ensures an even ignition of the entire pile.
Allow the lighter fluid to soak into the coals for about 30 seconds before lighting them up with a long match or grill lighter held near one end of the pile. Post ignition, give it a good 10-15 minutes for the entire pile to ignite fully before you start grilling. Always remember, safety is paramount when dealing with any flammable substance around open flames. Adhere to the manufacturer's instructions when using fire starters and ensure they're stored out of children's reach.
Natural Lighting Methods
Natural lighting methods, including using newspaper or kindling and electric starters like an electric coil starter positioned underneath your coal bed, or an electric wand starter held above your coal bed until red embers appear on your coals. For the newspaper or kindling technique, place crumpled-up newspapers beneath your pyramid of charcoal with small sticks (kindling) placed diagonally across them, just below the point where they'll come in contact with the coals once they start to burn.
Electric starters function by heating up coils or wands to red-hot temperatures, which subsequently ignite the coal bed. Once lit, the starter can be removed and the coals left to burn independently.
Although natural lighting methods might demand a bit more patience compared to using lighter fluid or fire starters, they're often more environmentally friendly and generate less smoke and ash. Additionally, they enable a more controlled ignition process, which can contribute to superior temperature regulation throughout your cooking session.
Monitoring and Adjusting Heat Levels
Grasping the concept of heat zones on your grill is instrumental in accomplishing the perfect BBQ. Different sections of the grill will have varying temperatures, and recognising these areas is crucial for cooking your food uniformly.
When grilling with charcoal, bear in mind that the heat source is positioned directly beneath the food. Consequently, some sections of your grill will be hotter than others, depending on your charcoal placement. By simply adding more charcoal to a specific area of the grill, you can create a hot zone, which is handy for searing meats or cooking vegetables that demand high heat.
Conversely, a cool zone is created by limiting the charcoal quantity in a certain area of the grill or by shifting the food away from direct heat sources. This encourages slower cooking and helps prevent charring.
Understanding Heat Zones on Your Grill
The three primary heat zones on your grill include the direct heat zone, the indirect heat zone, and the cool zone. Positioned directly above the charcoal, the direct heat zone has the highest temperature. This section should be utilised for searing meat or swiftly cooking foods that don't need much grilling time.
Adjacent to (but not directly over) the charcoal is the indirect heat zone, which has a temperature lower than the direct heat zone. Use this zone for foods that need lengthier cooking durations or for maintaining the warmth of cooked food.
The cool zone, situated furthest from the charcoal and devoid of any flame underneath, is ideal for slow-cooking foods or as a refuge if your food starts burning.
Regulating Temperature with Air Vents
Air vents play a crucial role in temperature control when grilling with lumpwood charcoal. To amplify the temperature, widen the vents. To reduce it, partially close the vents. The amount of air circulating through the grill directly influences its temperature.
When grilling with charcoal, it's critical to adjust the vents cautiously and progressively to prevent abrupt temperature changes. A sudden surge in airflow could lead to flare-ups and charred food, while an unexpected drop could extinguish your fire.
Adding More Charcoal as Required
Replenishing charcoal as needed is another method for managing heat levels when grilling with lumpwood charcoal. As your coals burn down, they'll produce less heat, necessitating a top-up. To add more charcoal, simply use tongs or a grill shovel to place fresh coals onto the existing ones.
When adding charcoal, ensure it's positioned on one side of your grill to maintain a cool zone for slow-cooking foods. Moreover, avoid adding excessive charcoal at once, as this could lead to a sudden temperature surge that could ruin your food or even cause a fire if not monitored vigilantly.
Tips for Preserving Flavour and Moisture
Enhancing Flavour with Soaked Wood Chips
One of the most effective ways to infuse flavour into your BBQ is by using wood chips. These small hardwood pieces are added to the charcoal during cooking. The resulting smoke imparts a rich, smoky essence to the meat, something difficult to achieve with other cooking techniques.
For optimal results, it's crucial to soak your wood chips in water before grilling. Soaking prevents the wood from igniting and burning rapidly, which could cause a bitter taste. It also aids in producing more smoke, contributing to more flavourful food.
Soak your wood chips by placing them in a bowl or container and covering them fully with water. Allow them to soak for a minimum of 30 minutes, but longer if possible, then drain off excess water before adding them to your grill.
Preserving Moisture with Water Pans or Spritz Bottles
Maintaining moisture in meat while cooking on a charcoal grill can be a significant challenge. High heat can dry out meat rapidly, resulting in tough and unappetising food. However, you can employ several techniques to preserve moisture while still achieving the desirable char-grilled flavour.
One option is to use a water pan on your grill. This is simply a shallow pan filled with water, positioned underneath or next to the food being cooked. The steam generated by the hot water helps keep the meat moist during cooking, yielding tender and juicy results.
Alternatively, spritz bottles filled with liquid (commonly apple juice or vinegar) can provide an extra layer of moisture on top of meats as they cook. Not only does this keep meats moist, but it also introduces additional flavours!
Ensure that you regularly check the water levels in your pans or bottles throughout the cooking process and replenish as required. By following these straightforward tips, you'll be able to retain moisture while still achieving perfectly charred, smoky meat on the grill.
Conclusion
Recap of Key Points
Lighting lumpwood charcoal for the perfect BBQ involves careful preparation, technique, and monitoring. It begins with selecting top-quality charcoal, arranging it in a pyramid formation, and using a chimney starter for consistent heat distribution. Lighting methods can range from using lighter fluid or fire starters to more natural techniques such as newspaper or electric starters.
Crucially, it's essential to keep an eye on and adjust heat levels as required, understanding your grill's heat zones and adjusting air vents as necessary. You can elevate your BBQ experience by maintaining flavour and moisture through methods such as soaking wood chips and utilising water pans or spritz bottles.
Encouragement to Experiment with Different Techniques
Whilst these tips offer a sturdy starting point for lighting lumpwood charcoal, don't hesitate to experiment with various techniques. Every BBQ master has their unique approach that suits them best. Try different brands of charcoal or various lighting methods to discover what gives you the best results.
Don't be afraid to shake things up - you might just uncover your new favourite method.
Final Thoughts on Achieving the Perfect BBQ
Attaining the perfect BBQ requires patience, practice, and an eye for detail. Bear in mind that every step matters - from choosing the right charcoal right through to monitoring heat levels and preserving moisture during cooking. And while striving for perfection is natural, remember that grilling should be enjoyable!
Relish the process of experimenting with different techniques and discovering what suits you best. Ultimately, there's no one 'right' way to light lumpwood - so it's time to get out there and start grilling!