Understanding Kiln Drying
The Basics of Kiln Drying
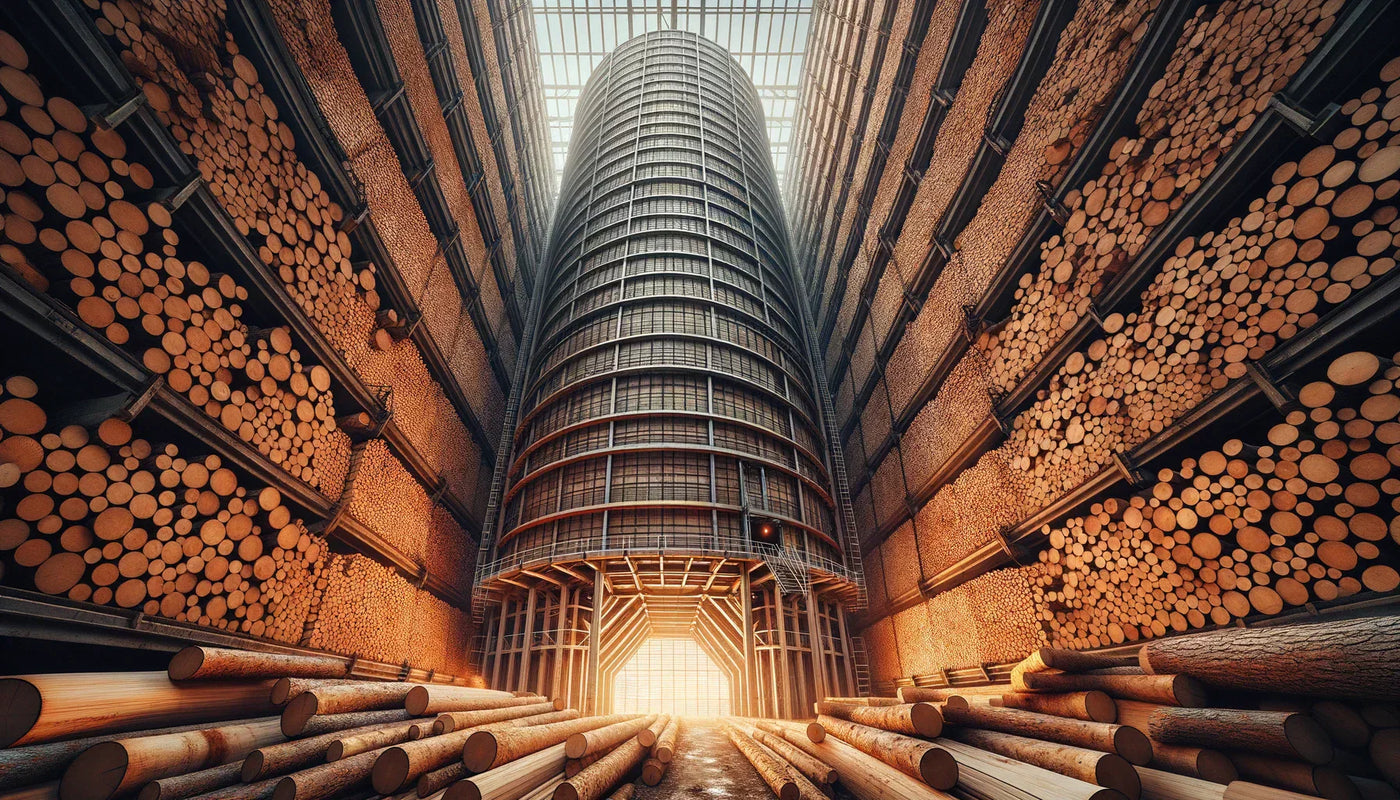
Kiln drying is a controlled process of reducing the moisture content in wood to a desired level. By placing wood in a specialized chamber, known as a kiln, and applying heat and controlling humidity, the natural drying process is significantly accelerated compared to traditional air drying.
This method is not only about expelling moisture; it's about doing so in a uniform and consistent manner. This prevents warping, cracking, or other forms of distortion that can occur when wood dries unevenly or too quickly. To understand the science of kiln drying, one must be familiar with terms such as equilibrium moisture content (EMC) which is the point where wood neither gains nor loses moisture from the environment.
Advantages of Kiln Drying Over Air Drying
Speed: The most obvious benefit of kiln drying is the time saved. While air drying can take months or even years depending on the species and thickness of the wood, kiln drying can achieve the same results in days or weeks.
Quality: Kiln drying offers more control over the drying process, resulting in higher quality wood with consistent moisture content. This is crucial for wood intended for fine furniture or precision instruments where dimensional stability is key.
Pest Control: Kilns can heat wood to temperatures that eliminate fungi and insects, making the wood safer and more durable.
All-Weather Operation: Unlike air drying, kiln drying can be done in any weather, allowing for year-round operation and better planning for manufacturers.
Versatility: Modern kilns can accommodate different wood types and sizes, offering flexibility for various drying needs.
For an in-depth look into the differences between kiln and air drying, consider reading our blog post on the subject here.
Types of Kilns Used for Drying Wood
Conventional Kilns: These operate on the principle of applying heat and controlling airflow and humidity. They are the most widely used type of kiln due to their simplicity and effectiveness.
Dehumidification Kilns: These kilns use a heat pump to remove moisture from the air inside the kiln. They are generally more energy-efficient than conventional kilns and are used for smaller operations.
Solar Kilns: These are an environmentally friendly option that use solar energy to generate the heat required for drying wood. However, they are dependent on weather conditions and have less control over the drying process.
Vacuum Kilns: These dry wood at lower temperatures under vacuum pressure, which speeds up the drying process and reduces the risk of defects in the wood. They are more expensive and typically used for specialty drying.
Preparing for Kiln Drying
Selecting the Right Wood
Not all wood is suitable for kiln drying. Some species are more prone to cracking or splitting, and certain defects or previous damage can be exacerbated by the drying process. It's crucial to inspect each piece of wood for suitability:
- Species: Research on how different species respond to kiln drying.
- Quality: Check for existing defects, like knots or splits.
- Purpose: Consider the end-use of the wood - some applications may require higher or lower moisture content.
Moisture Content and Its Importance
Moisture content is the amount of water present in the wood, usually expressed as a percentage of the wood's dry weight. The goal of kiln drying is to reduce this to a level suitable for the intended use of the wood.
The proper moisture content prevents post-production issues like shrinkage or expansion, which can lead to cracks or warping. Understanding the target moisture content for different applications is vital:
- Furniture: Typically requires a moisture content of around 6-8%.
- Construction: Moisture content can be a bit higher, usually around 9-14%.
Using a moisture meter is essential for assessing the moisture content before and after drying. To learn more about moisture content and its significance, check out this detailed guide here.
Pre-Kiln Drying Considerations
Before placing the wood in the kiln, it's important to take a few preparatory steps:
- Stacking: Wood should be stacked with spacers known as "stickers" to allow for even airflow between planks.
- End-Coating: Applying a wax or paint to the ends of planks can prevent rapid moisture loss which leads to end-checks (cracks).
- Kiln Size: Match the quantity and size of the wood with the appropriate kiln size to ensure efficient drying.
Taking the time to adequately prepare your wood for kiln drying is a crucial step towards achieving optimal results. Consider reading our blog post for more on pre-kiln drying considerations here.
By understanding the basics and preparatory steps of kiln drying, you can ensure a smoother and more effective drying process. This foundational knowledge sets the stage for more practical and technical aspects involved in the actual kiln drying process.
Kiln Drying Process
Kiln drying is a critical process for woodworkers and lumber producers, as it accelerates the removal of moisture from wood, ensuring it is ready for use in various applications. Proper kiln drying can help prevent problems such as warping, fungal growth, and insect infestations. Here's a step-by-step guide to ensure you get the best results from your kiln drying process.
Step-by-Step Guide to Loading the Kiln
1. Sort and Organize the Wood:
- Ensure all the wood has a uniform thickness and is sorted by species, as this will allow for a more consistent drying process.
- Remove any wood with obvious defects that could affect drying, such as large knots or splits.
2. Prepare Stickers and Spacers:
- Stickers (thin strips of wood) are placed between each layer of lumber to ensure adequate airflow.
- Ensure stickers are uniform in thickness and made from kiln-dried wood to avoid staining.
3. Load the Kiln:
- Place the first layer of wood on the kiln floor, making sure there's space between each board for air to circulate.
- Lay stickers across this first layer at regular intervals to support the next layer of wood.
4. Continue Stacking:
- Repeat the process, stacking wood and stickers until the kiln is loaded.
- Make sure to align the stickers vertically to promote even drying.
5. Check for Proper Airflow:
- Before closing the kiln, ensure there are no blockages and that air can move freely around the wood.
6. Secure the Load:
- If your kiln requires it, use straps or weights to secure the wood in place to prevent warping as the wood dries.
Setting the Correct Temperature and Humidity
The optimal temperature and humidity for kiln drying wood depend on the species being dried and its current moisture content. Here's how to set the right conditions:
1. Consult Drying Schedules:
- Each species of wood has a recommended drying schedule, which specifies the temperature and humidity settings.
2. Start with a Lower Temperature:
- Begin with a lower temperature to avoid surface checking and gradually increase as the wood dries.
3. Adjust Humidity:
- Use wet bulb and dry bulb thermometers to measure and adjust the kiln's relative humidity.
- High humidity is necessary at the start to prevent the wood from drying too quickly.
4. Monitor and Adjust:
- Continually monitor the kiln's environment and make adjustments as needed based on the wood's response to the drying process.
Further reading on temperature and humidity controls can be found in our detailed article on temperature control in kiln drying.
Monitoring the Drying Process
Monitoring is crucial to the success of kiln drying. Regular checks ensure the wood dries evenly and prevents defects. Here's how to monitor effectively:
1. Use Moisture Meters:
- Check the wood's moisture content regularly with a reliable moisture meter.
- Record readings to track the drying progress.
2. Inspect the Wood:
- Physically inspect the wood for signs of stress, such as warping or cracking.
- Adjust kiln settings if you notice any issues.
3. Keep a Drying Log:
- Maintain a log of all the temperature, humidity, and moisture content readings.
- Use this log to make data-driven decisions throughout the drying process.
4. Consider Sample Boards:
- Using sample boards from the same batch of wood can provide an accurate representation of the overall drying process without needing to probe every piece.
Troubleshooting Common Problems
Even with careful monitoring, you may encounter problems during the drying process. Here are common issues and their solutions:
Identifying and Resolving Issues With Drying
1. Case Hardening:
- This occurs when the outer shell of the wood dries too quickly, trapping moisture inside.
- Solution: Adjust the kiln to lower the temperature and increase humidity to equalize moisture content.
2. Honeycombing and Checks:
- Internal checks (cracks) can develop if the wood is dried too rapidly.
- Solution: Slow down the drying process and ensure the temperature rise is gradual.
Adjustments During the Drying Cycle
1. Mid-Cycle Corrections:
- If the wood is not drying uniformly, don't hesitate to rearrange the stack or modify the settings.
- Make small adjustments to avoid shock to the lumber.
2. Responding to Defects:
- If defects appear, assess whether they are widespread or isolated.
- Adjust the drying schedule accordingly, or remove affected boards to prevent further damage.
Ensuring Even Drying Throughout the Kiln
1. Uniform Airflow:
- Check that fans and vents are working correctly to distribute air evenly.
- Consider load size and kiln design to optimize airflow and heat distribution.
2. Regular Rotation:
- In some kilns, rotating the wood during drying can promote more even moisture removal.
- This is particularly critical for thicker cuts or denser species.
By following these steps and remaining vigilant, you can minimize issues and ensure your wood dries uniformly and is ready for the next stage of production or crafting. If you encounter persistent issues or feel uncertain about the drying process, seeking out advice from online forums and communities for kiln users can be invaluable.
After the Drying Process
Once the kiln drying process is complete, your wood has gone through a significant transformation. It's now ready for the next phase of its journey, which could be anything from becoming part of a beautiful piece of furniture to being burned for a cozy fire. Let's dive into the critical steps that follow the actual drying process.
Unloading the Kiln
Unloading the kiln is a task that requires careful handling to protect the quality of the dried wood. Here is a guide to unloading your kiln properly:
- Allow the Wood to Cool: Before unloading, it's important to let the wood and kiln cool down to avoid any sudden changes in temperature, which can cause stress in the wood.
- Check Moisture Content: Use a moisture meter to ensure that the wood has reached the desired moisture content. If the wood hasn't dried uniformly or to the correct level, consider a conditioning period.
- Handle With Care: When unloading, handle the wood carefully to avoid denting or damaging the dry, often more brittle timber.
- Stacking: Immediately restack the wood in a dry, well-ventilated area to ensure it doesn't reabsorb moisture from the environment.
The proper unloading of your kiln ensures that the wood remains in good condition and is ready for use or sale. If you're in the market for wood, make sure to check out options such as kiln-dried wood for your next project.
Conditioning the Wood Post-Drying
Conditioning is a crucial step that can't be overlooked. It's about bringing the entire load of wood to a uniform moisture content and relieving any stresses caused by drying. Here's how to condition your wood:
- Equalizing: This involves maintaining temperature and humidity conditions in the kiln to allow the moisture content to equalize throughout the wood.
- Stress-Relief: For certain types of wood, a period of stress relief, or 'resting', is necessary to prevent warping or cracking after the wood leaves the kiln.
- Final Moisture Check: Before using or selling the wood, perform one last check with a moisture meter to ensure that it is at the optimal moisture content for its intended use.
Conditioning helps to ensure the wood's stability, making it more durable and less likely to have issues when worked on or put to use.
Storing Dried Wood Properly
After drying and conditioning, storing the wood correctly is vital to maintain its quality. Here are some tips for proper storage:
- Dry Environment: Store the wood in a place with low humidity to prevent it from reabsorbing moisture from the air.
- Off the Ground: Keeping the wood off the ground prevents it from absorbing moisture and protects it from insects and rodents.
- Covered Storage: Use a tarp or other cover to protect the wood from rain and direct sunlight, which can lead to uneven moisture levels and potential warping.
- Good Airflow: Ensure there is good ventilation around the stacked wood to allow air to circulate and prevent the buildup of moisture.
Safety and Maintenance
Working with kilns involves high temperatures and potentially hazardous equipment, so safety should always be your top priority. Maintenance of the kiln is also crucial to ensure its longevity and efficient operation.
Safety Precautions When Using a Kiln
To ensure safety while using a kiln, follow these guidelines:
- Wear Protective Gear: Always use heat-resistant gloves and eye protection when operating the kiln.
- Check Ventilation: Proper ventilation is crucial to avoid the buildup of fumes that could be harmful or flammable.
- Regular Inspections: Before each use, inspect the kiln for any signs of damage or wear, especially to the heating elements and insulation.
- Clear Area: Maintain a clear area around the kiln free from flammable materials.
Staying safe means you can continue enjoying the benefits of kiln drying without putting yourself at risk. For more information on safety, this blog post offers detailed insights.
Routine Maintenance for Your Kiln
To keep your kiln in top shape, establish a routine maintenance schedule. This should include:
- Cleaning: Regularly clean the interior of the kiln to remove sawdust and debris.
- Element Check: Inspect the heating elements for any signs of damage or wear.
- Control Systems: Test the control systems and sensors to ensure accurate temperature and humidity readings.
- Seals and Gaskets: Check and replace door seals and gaskets as needed to maintain a proper seal.
Proper maintenance reduces the risk of kiln failure and ensures consistently high-quality results from your drying processes.
When to Seek Professional Servicing
There are times when it's best to call in a professional for servicing:
- Complex Repairs: If there's an issue with the kiln's electrical system or other complex components, it's safer and more efficient to get professional help.
- Annual Check-Ups: Even with routine maintenance, having a professional service your kiln annually can help catch issues you may have missed.
- After a Malfunction: If your kiln has experienced a significant malfunction, a professional can ensure that it's not only fixed but also safe to continue using.
Remember, it's better to invest in professional servicing than to risk a larger problem by attempting repairs beyond your expertise.
Advanced Kiln Drying Techniques
Optimizing Your Kiln for Different Wood Types
When it comes to kiln drying, understanding that different types of wood require different drying methods is crucial for achieving optimal results. The density, grain pattern, and initial moisture content of wood can significantly influence how it should be kiln dried. Here's how you can optimize your kiln drying process for various wood types:
- Identify the Wood Species: Start by categorizing the wood species you are working with. Softwoods like pine dry differently than hardwoods like oak.
- Adjust Drying Schedules: Each species has a recommended drying schedule. These schedules dictate temperature, humidity, and air flow settings that cater to the specific drying characteristics of the wood.
- Use Species-Specific Kiln Stickers: Stickers are the spacers placed between lumber layers in the kiln. The width and thickness of these stickers can vary depending on the wood species and size.
- Consider the Initial Moisture Content: Woods with higher initial moisture content will need a gentler drying curve to prevent checking and splitting. Use a moisture meter to get accurate readings before starting.
By tailoring the kiln settings to the specific needs of the wood you are drying, you can ensure minimal defects and an even drying process.
Using Kiln Drying Schedules Effectively
Kiln drying schedules are designed to apply the correct rate of heat and humidity over time to remove moisture from wood without causing damage. Here’s how to use them effectively:
- Understand the Schedule Basics: Drying schedules are usually broken down into stages, with each stage specifying temperature, relative humidity, and air circulation targets.
- Apply the Schedule Correctly: Always start at the beginning of the schedule, even if the wood has been pre-dried or is partially air-dried. Skipping ahead can cause stress and defects in the wood.
- Monitor and Adjust: Even the best schedules may need adjustment based on real-time monitoring of the wood’s moisture content and the kiln conditions.
Proper use of kiln drying schedules can significantly improve the quality of the dried wood and the efficiency of the drying process.
The Role of Kiln Controllers in Advanced Drying
Kiln controllers are the brains of the operation. These sophisticated devices can automate the drying process, making it easier and more precise. Modern kiln controllers allow you to:
- Program Drying Schedules: Input the desired drying schedule directly into the controller for automated temperature, humidity, and vent adjustments.
- Monitor Conditions Remotely: Some controllers are equipped with remote monitoring features, enabling you to check on the kiln’s conditions from your smartphone or computer.
- Record Data: Controllers can record data throughout the drying process, which you can analyze later to make improvements.
Investing in a good kiln controller can take much of the guesswork out of drying and lead to consistent, high-quality results.
Final Thoughts
Advancing your knowledge and skills in kiln drying can lead to better-quality wood, more efficient operations, and ultimately, a more successful woodworking or lumber business. By optimizing your kiln settings, mastering drying schedules, utilizing advanced controllers, and engaging with additional resources, you're well on your way to becoming a kiln drying expert. For those interested in high-quality wood fuels and products, don't forget to check out the vast options available at HSWF, including kiln-dried wood, Swedish fire logs, and hardwood ash logs.