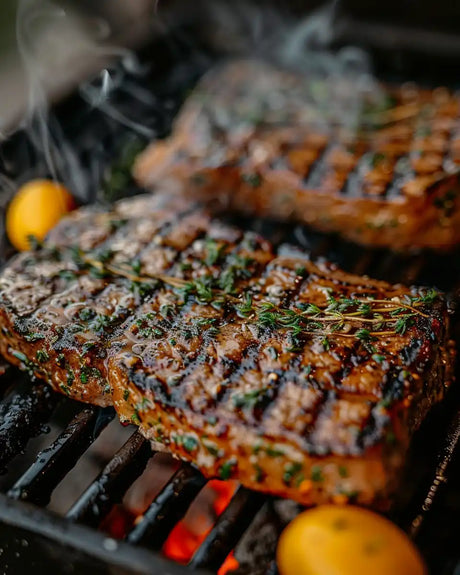
Grilling with charcoal is an art that requires not only skill in cooking but also in managing the heat source itself. Mid-grill charcoal addition can be a daunting task, but with the right knowledge and techniques, it can be done seamlessly to ensure perfect cooking results. This article delves into various aspects of adding charcoal mid-grill session, including understanding different charcoal types, preparation techniques, strategies for adding charcoal, advanced grilling tips, and post-grill maintenance. Whether you're a seasoned pitmaster or a weekend griller, these insights will help you master the embers and elevate your grilling game.
Key Takeaways
- Understanding the differences between lump charcoal and briquettes, and how to match the right type with your grill is crucial for a successful cook.
- Pre-lighting charcoal and taking safety precautions are key for a smooth and safe mid-session refuel.
- Adding charcoal little by little or using charcoal baskets can help maintain temperature consistency and minimize disruptions.
- Creating heat zones and ensuring proper ventilation are advanced techniques that can enhance your grilling experience when adding charcoal.
- Properly disposing of ashes, cleaning the grill, and storing unused charcoal are essential steps for maintaining your grill and being ready for the next session.
Understanding Charcoal Types and Their Uses
Lump Charcoal vs. Briquettes: Pros and Cons
When we're grilling, the choice between lump charcoal and briquettes is crucial. Lump charcoal burns hotter and faster, providing a searing temperature perfect for steaks. It's made from pure hardwood with no additives, giving food a clean, smoky flavor. However, it can be less consistent in size and burn time.
Briquettes, on the other hand, offer a more uniform shape and size, leading to a predictable burn. They're ideal for extended cooking sessions, like smoking or slow roasting. But be mindful, some briquettes contain fillers and chemicals that can impart off-flavors to your food.
We must consider our cooking needs and the flavor profile we desire when choosing between lump charcoal and briquettes. Each type has its place on the grill, and understanding their characteristics will help us achieve grilling perfection.
Here's a quick comparison to guide us:
-
Lump Charcoal
- Burns hotter
- Quick lighting
- Less ash production
- Variable burn time
-
Briquettes
- Consistent burn
- Longer lasting
- More ash
- Potential for added chemicals
Matching Charcoal to Your Grill Type
When we're grilling, it's crucial to match the type of charcoal to the grill we're using. Different grills function optimally with specific types of charcoal, and using the wrong one can affect the heat and flavor of our food. For instance, ceramic grills work best with lump charcoal due to its ability to reach high temperatures and its cleaner burn.
Charcoal grills, on the other hand, are more versatile and can work well with both lump charcoal and briquettes. Briquettes are ideal for longer, more consistent cooking temperatures, which is perfect for slow-cooking meats. Here's a quick guide to help you match your charcoal to your grill type:
- Ceramic Grills: Lump Charcoal
- Kettle Grills: Lump Charcoal or Briquettes
- Barrel Grills: Briquettes
- Portable Grills: Lump Charcoal (for quick cooking)
Remember, the goal is to maintain a consistent cooking temperature. Choosing the right charcoal for your grill type is a step towards achieving that consistency.
Finally, always consider the manufacturer's recommendations. They often provide the best guidance for what type of charcoal works best with their grills. By following these tips, we ensure a successful and enjoyable grilling experience.
Estimating the Right Amount for Your Cook
When we're in the thick of grilling, running out of fuel can throw a wrench in our plans. Estimating the right amount of charcoal is crucial to avoid such mishaps. It's not just about avoiding a mid-cook scramble; it's also about ensuring the quality of our food. We've found that a good rule of thumb is about 30 briquettes for every pound of meat. However, this can vary based on factors like wind, temperature, and grill efficiency.
Grill size also plays a pivotal role in determining how much charcoal we'll need. Here's a quick reference table to help us gauge our needs:
| Grill Size (inches) | Charcoal Needed (briquettes) |
|---|---|
| 18-22 | 30-40 |
| 23-26 | 40-50 |
| 27+ | 50-70 |
Remember, it's always better to have a little extra charcoal on hand than to be caught short. We can always snuff out the excess and save it for next time.
Finally, let's consider the cooking time. Longer cooks will naturally require more charcoal. For those extended sessions, we should plan on adding more charcoal every hour or so to maintain a consistent temperature. Keeping a close eye on the temperature gauge will help us make timely adjustments.
Preparation Techniques for Mid-Session Refueling
Pre-lighting Charcoal for a Smooth Transition
When we're in the thick of a grilling session and realize we need more fuel, pre-lighting charcoal can be a game-changer. Pre-lighting ensures that the charcoal is ready to use when added to the grill, avoiding temperature drops that can affect cooking consistency. We always recommend having a small, separate grill or a metal bucket on hand for this purpose.
Pre-lighting charcoal is simple, yet it requires attention to detail to avoid mishaps. Here's a quick guide we follow:
- Start by filling a chimney starter with the necessary amount of charcoal.
- Use a fire starter or newspaper to ignite the charcoal from the bottom.
- Allow the charcoal to burn until it's covered with a thin layer of ash.
- Carefully transfer the lit charcoal to the main grill.
Remember, the goal is to maintain a steady temperature within your grill. Adding pre-lit charcoal helps to achieve this without interrupting the cooking process.
It's essential to keep safety in mind. Always use heat-resistant gloves and handle the chimney starter with a firm grip. By pre-lighting your charcoal, we ensure a seamless continuation of our grilling session, keeping those steaks sizzling perfectly.
Safety Measures When Handling Hot Grills
When we're in the thick of a grilling session, adding charcoal can be a bit like dancing with fire—literally. Safety is paramount, and we must respect the heat we're working with. Always wear protective gloves designed to withstand high temperatures; this isn't the time for those flimsy kitchen mitts.
Long-handled tools are your best friends here. They allow us to maintain a safe distance from the heat source while manipulating the grill grates or adding charcoal. Here's a quick checklist to keep in mind:
- Ensure the grill is stable and on a flat surface.
- Keep a fire extinguisher or bucket of sand nearby for emergencies.
- Never leave the grill unattended, especially with children or pets around.
Remember, the goal is to add charcoal without becoming a cautionary tale. Quick, deliberate actions reduce the risk of accidents.
Lastly, if you need to remove the grill grate to add more charcoal, use a grate lifter or pliers. Place the grate on a non-combustible surface while you're refueling. Once you've safely added the charcoal, return the grate to its position with the same caution. This way, we ensure that our grilling experience remains enjoyable and, above all, safe.
Maintaining Temperature Consistency
When we add charcoal mid-grill, our primary goal is to maintain a consistent temperature. The key is to avoid sudden spikes or drops that could affect the cooking process. We've found that a gradual approach works best, adding small amounts of charcoal at regular intervals. This method allows the new charcoal to ignite from the existing embers without causing a significant temperature change.
Temperature consistency is crucial for ensuring that our food cooks evenly. To help manage this, we can use a temperature probe to monitor the grill's heat. Here's a simple guideline we follow:
- Check the temperature every 15 minutes.
- Add 5-10 briquettes if the temperature drops below the desired range.
- Adjust the grill vents to regulate airflow and control the heat.
Remember, patience is a virtue when grilling. Rushing the process can lead to overcompensation and an undesirable outcome.
By adhering to these practices, we ensure that our grilled dishes are cooked to perfection, with the right amount of smokiness and a succulent texture.
Strategies for Adding Charcoal Without Disrupting the Cook
The Top-Up Method: Adding Charcoal Little by Little
When we're deep into our grilling session and notice the heat waning, it's time to employ the top-up method. This approach involves adding small amounts of charcoal incrementally to maintain the desired temperature without causing a significant disruption to the cooking process.
Charcoal should be added gently to the edges of the existing coals. Here's a simple step-by-step guide to ensure a smooth top-up:
- Open the grill lid and vents to ensure a safe working environment.
- Using tongs, carefully rearrange the glowing coals to create a space for the new charcoal.
- Add a few pieces of charcoal to the created space, avoiding any direct contact with food to prevent ash from settling on it.
- Close the lid quickly to minimize heat loss and allow the new charcoal to catch fire from the existing embers.
Remember, patience is key. Allow the new charcoal to ignite and come up to temperature gradually; rushing this process can lead to temperature spikes or unwanted smoke.
By following these steps, we ensure a consistent cooking environment that will bring out the best in our dishes. It's also essential to choose the right type of charcoal for this method. A premium hardwood charcoal selection can make all the difference, offering superior airflow and minimal ash.
Using Charcoal Baskets for Easy Addition
When we're in the thick of grilling, maintaining the heat without causing major disruptions to our cook is crucial. Charcoal baskets are our best friends in this scenario. These handy accessories allow us to add charcoal neatly and efficiently, without the risk of unlit coals smothering the fire.
Charcoal baskets are designed to hold the coals in a contained space, making it easier to manage the fire and maintain a consistent temperature. Here's how we use them:
- Place the charcoal basket in your grill before starting your cook.
- Pre-fill the basket with a base amount of charcoal.
- As the temperature begins to drop, add pre-lit charcoal to the basket.
By using a charcoal basket, we ensure that the new coals ignite quickly and evenly, avoiding cold spots on the grill.
Remember, the goal is to keep the heat steady and the food cooking perfectly. With a charcoal basket, we can achieve just that, making our mid-session refueling a seamless part of the grilling experience.
Minimizing Smoke and Flare-Ups
When we're deep into our grilling session, the last thing we want is a cloud of smoke or sudden flare-ups. Keeping our food and guests comfortable is paramount. We've gathered some pro tips to help you add charcoal without the unwanted drama of excessive smoke or fire hazards.
- Start by using a chimney starter to ignite your lumpwood charcoal; this method reduces smoke and ensures a more even burn.
- Arrange the coals to promote good airflow; this minimizes smoke as oxygen can circulate properly.
- Employ a two-zone fire approach, which not only gives you control over cooking temperatures but also reduces the likelihood of flare-ups.
- For longer cooking sessions, add unlit charcoal to the fire; it will gradually ignite from the existing coals, maintaining a steady temperature with minimal smoke.
- To enhance the flavor without increasing smoke, consider adding wood chunks to your charcoal. Choose sustainably sourced lumpwood with a high wood content for the best performance and flavor.
Remember, the key to minimizing disruptions is to manage the addition of charcoal carefully and thoughtfully. By following these steps, we ensure a smooth grilling experience for everyone involved.
Advanced Grilling Techniques with Charcoal
Creating Heat Zones for Different Cooking Stages
When we're grilling, creating heat zones is a pivotal technique for managing different cooking stages. By arranging the charcoal in specific patterns, we can establish areas of direct and indirect heat, allowing us to sear, roast, or even slow cook our food on the same grill.
Heat zones enable us to move food between high and low temperature areas, effectively controlling the cooking process. Here's a simple guide to setting up heat zones:
- Direct Zone: Place a concentrated pile of charcoal for high heat. Ideal for searing meats.
- Indirect Zone: Leave an area with no charcoal underneath. Perfect for cooking food through without burning.
- Transition Zone: Create a gradient of charcoal between the direct and indirect zones for moderate cooking.
Remember, the key to successful heat zone grilling is to monitor and adjust the distribution of charcoal as needed. This ensures that each food item receives the appropriate amount of heat throughout the cooking session.
Maintaining these zones requires a bit of practice, but once mastered, it gives us the flexibility to handle multiple dishes at once, each requiring different cooking temperatures and times.
The Importance of Ventilation When Adding Charcoal
When we add charcoal to an ongoing grill session, maintaining proper ventilation is crucial. Proper airflow is essential for controlling temperature and preventing dangerous flare-ups. It's not just about keeping the fire going; it's about managing the heat to ensure our food cooks evenly and safely.
Ventilation also plays a key role in determining how quickly the new charcoal ignites and integrates with the existing coals. Here's a quick checklist to ensure you're maintaining good ventilation:
- Keep the grill vents open when adding new charcoal.
- Avoid overcrowding the grill with too much charcoal.
- Arrange the charcoal to allow for air to circulate freely.
Remember, the goal is to add charcoal without smothering the fire or creating excessive smoke. By following these steps, we can ensure a smooth transition and a consistent cooking temperature.
Mastering the Use of Charcoal Chimneys
We've all been there, standing by the grill, wondering how to add more fuel without dousing the flames or waiting forever for the charcoal to catch. The solution is mastering the use of charcoal chimneys. These ingenious devices allow us to pre-light charcoal and add it to the grill when it's ready, ensuring a seamless transition and maintaining the perfect cooking temperature.
Charcoal chimneys streamline the process of adding charcoal mid-grill session. Here's a simple step-by-step guide to using them effectively:
- Fill the chimney with the appropriate amount of charcoal.
- Place a lighter cube or crumpled newspaper under the chimney and light it.
- Wait for the charcoal to become covered in a light layer of ash; this indicates it's ready to use.
- Carefully pour the lit charcoal onto the grill or into a charcoal basket.
Remember, the key to a successful addition of charcoal is to do it without losing heat or creating a dangerous situation. Always wear protective gloves and use the right tools to handle hot equipment.
By incorporating a charcoal chimney into our grilling toolkit, we can maintain a consistent cooking environment, which is crucial for dishes that require precise temperature control. It's not just about keeping the fire going; it's about elevating our grilling game to produce the best possible results.
Post-Grill Maintenance and Charcoal Management
Proper Disposal of Ashes and Partially Used Charcoal
After a successful grilling session, we're often left with the question of what to do with the remaining ashes and partially used charcoal. Proper disposal is crucial not only for cleanliness but also for safety and environmental reasons.
Ashes, especially from charcoal, can retain heat for hours, even days, after the fire is out. Therefore, it's essential to ensure they are completely extinguished before disposal. Here's a simple guide we follow:
- Allow the ashes to cool in the grill for at least 48 hours.
- Transfer the ashes to a metal container with a tight-fitting lid.
- Soak the ashes in water to ensure they are fully extinguished.
- Dispose of the soaked ashes in non-combustible waste.
When dealing with partially used charcoal, consider saving it for your next grilling session. Charcoal can often be reignited, providing not only a cost-effective solution but also a way to reduce waste. Just make sure to store it in a dry place to prevent it from becoming damp.
Remember, never dispose of hot ashes directly into a trash can or onto any combustible surface, as this can lead to a dangerous situation. By following these steps, we ensure a safe and responsible end to our grilling experience.
Cleaning Your Grill After Charcoal Addition
After we've mastered the art of adding charcoal mid-grill session, it's crucial to turn our attention to the aftermath. Ensuring our grill remains clean will not only prolong its life but also maintain the quality of our future barbecues. The process is straightforward, yet often overlooked.
Ash and residue from charcoal can accumulate and impede performance. To prevent this, we follow a simple routine:
- Allow the grill to cool down sufficiently before cleaning.
- Remove the grates and soak them in soapy water.
- Brush off any loose debris from the grill's interior.
- Wipe down the surfaces with a damp cloth to remove ash and grease.
Regular maintenance after each use is the key to a grill that's always ready for action. It's a small effort that pays off in the long run, ensuring that every grilling session can start on the right foot.
Lastly, inspect the grill for any damage or wear. Replace any parts as necessary to keep our grill in top condition. By taking these steps, we not only clean our grill but also prepare it for its next use, making our grilling experience consistently enjoyable and hassle-free.
Storing Unused Charcoal for Future Sessions
After a successful grilling session, we often find ourselves with leftover charcoal. It's crucial to store this charcoal properly to ensure it lights easily and burns effectively for future use. Proper storage will not only save money but also maintain the quality of your charcoal.
To keep your charcoal dry and ready for your next barbecue, follow these simple steps:
- Store charcoal in a cool, dry place away from direct sunlight.
- Use an airtight container or a metal bin with a lid to prevent moisture from seeping in.
- Avoid storing charcoal on the ground; elevate it to protect against dampness.
Remember, moisture is the enemy of charcoal. By keeping it dry, you're preserving its ignitability and ensuring a quick start to your next grilling adventure.
Lastly, check on your stored charcoal periodically. If you notice any dampness or a musty smell, it may be time to refresh your supply. By being vigilant, we can always be ready for the next impromptu cookout.
Conclusion
Mastering the art of grilling with charcoal is a rewarding endeavor that elevates the flavor of your food and the joy of outdoor cooking. By incorporating the tips we've discussed for adding charcoal mid-grill session, you can maintain a consistent temperature, avoid unwanted flare-ups, and ensure your meats and vegetables are cooked to perfection. Remember to preheat your additional charcoal, use the right tools for safety and efficiency, and monitor the grill's temperature throughout the cooking process. With practice and patience, you'll become adept at adjusting the heat on the fly and impressing your guests with your grilling prowess. So, fire up the grill, embrace the embers, and enjoy the delicious results of your well-managed charcoal grill.
Frequently Asked Questions
Can I add charcoal to my grill while I'm cooking?
Yes, you can add charcoal mid-grill session. It's important to do so carefully to maintain temperature and avoid flare-ups.
What's the difference between lump charcoal and briquettes?
Lump charcoal is made from pure wood and lights faster, burns hotter, and leaves less ash. Briquettes are made from compressed charcoal dust and binders, burn more consistently, and are often cheaper.
How do I estimate how much charcoal I need to add?
Estimating charcoal depends on your grill size, the type of food you're cooking, and the cooking duration. A general rule is to add enough to maintain the desired temperature for the remaining cooking time.
What's the safest way to add charcoal to a hot grill?
Use long-handled tongs to add pre-lit charcoal, wear heat-resistant gloves, and avoid pouring directly from the bag to prevent accidents.
How can I maintain a consistent temperature when adding charcoal?
Pre-light charcoal in a chimney starter before adding it to the grill. This way, the charcoal is at the right temperature when it's added, helping to maintain consistency.
Is it necessary to clean the grill after adding charcoal during a session?
Yes, it's important to clean your grill after each use. Adding charcoal can create additional ash and debris, so ensure the grill is properly maintained to prolong its life and ensure good performance.