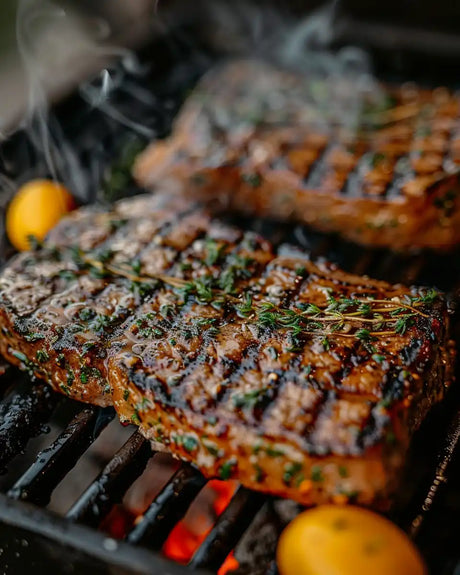
Charcoal grilling is a beloved activity for many, promising delicious flavors and memorable gatherings. However, the post-grill clean-up is an essential step to ensure that your equipment remains in top condition for future use. This article delves into efficient ways to wind down after a charcoal grilling session, covering everything from assessing your grill's condition to storing your grilling gear properly. By following these guidelines, you can maintain your grill's longevity and enjoy a hassle-free start to your next barbecue.
Key Takeaways
- Regular inspection of the grill for residual charcoal, ash, and food particles is crucial to maintain cleanliness and functionality.
- Using the appropriate cleaning tools and techniques, such as specific brushes and scrapers, ensures effective cleaning without damaging grill grates.
- Proper disposal of ash and careful maintenance of grill components like cast iron surfaces can prevent rust and extend the grill's lifespan.
- Organizing and properly storing grilling tools, accessories, and charcoal will protect them from the elements and make future grilling sessions more efficient.
- Preparation for the next cookout should include restocking essential supplies and creating a checklist to ensure a quick and easy grill set-up.
Assessing Your Grill Post-Cookout
Inspecting for Residual Charcoal and Ash
After the flames have died down and the last burger has been devoured, we turn our attention to the grill. Ensuring that all residual charcoal and ash are removed is crucial for the longevity of our grill and safety of our next cookout. We begin by carefully examining the grill bed, identifying any leftover charcoal that could be saved for future use.
Ash, especially when cooled, can be corrosive and should be disposed of properly. Here's a simple checklist to follow:
- Wait for the ash to cool completely
- Use a metal scoop or shovel for removal
- Transfer ash to a metal container with a tight-fitting lid
It's important to remember that ash can remain hot for hours, posing a fire hazard. Always ensure it's completely cold before disposal.
By methodically inspecting and cleaning out the grill, we not only prepare it for its next use but also prevent any unwanted surprises like a clogged air vent or a dirty grill bed that could affect our grilling experience.
Checking Grill Grates for Food Particles
After the flames have died down and the last burger has been savored, we turn our attention to the grill grates. Ensuring they are free of food particles is crucial not only for the longevity of our grill but also for the quality of our next cookout. Leftover bits can attract pests and contribute to the buildup of harmful bacteria.
Scrubbing the grates while they're still warm can make the task easier, as the heat helps to loosen any stuck-on food. Here's a simple process we follow:
- Let the grates cool down to a safe, yet warm temperature.
- Use a grill brush or scraper to remove the bulk of the residue.
- For stubborn particles, we apply a paste of baking soda and water, then scrub gently.
- Rinse the grates with water and dry them thoroughly to prevent rust.
It's important to perform this step every time we grill. A clean grate ensures even cooking and the true flavors of our food.
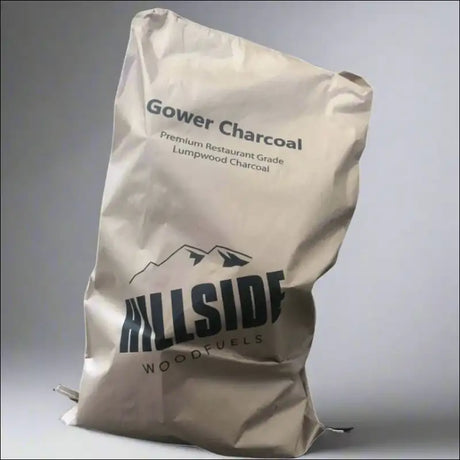
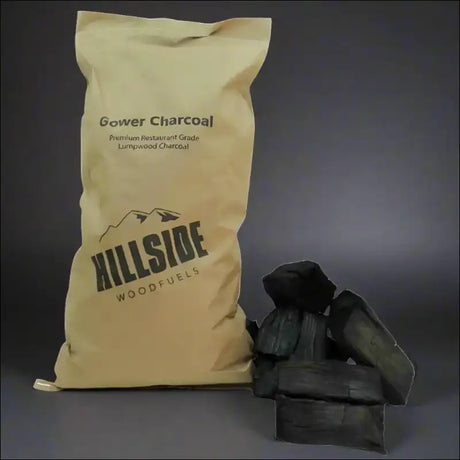
Remember, the type of charcoal we use can affect the amount of residue left on the grates. Restaurant grade charcoal, for example, offers efficient burning and consistent heat, which can result in minimal ash and less frequent deep cleanings.
Evaluating the Condition of Grill Accessories
After a satisfying cookout, we take a moment to assess our grill accessories. The state of these tools can greatly impact the quality and safety of our grilling experience. We start by checking for any signs of wear or damage on items like tongs, spatulas, and brushes. It's crucial to identify any issues that could lead to accidents or affect the food's flavor.
Durability is a key factor when it comes to grill accessories. We make a mental note of items that have withstood the test of time and those that may need replacing. Here's a quick checklist to help us keep track:
- Inspect handles for stability and grip
- Look for rust or corrosion on metal parts
- Check for melted or deformed areas on plastic components
- Ensure cleaning brushes still have firm bristles
By maintaining our accessories in top condition, we not only ensure a safer grilling experience but also save money in the long run by avoiding frequent replacements.
Finally, we consider the cleanliness of our tools. A thorough wash is necessary to remove any grease or food residue, which can harbor bacteria and affect our next grilling session. We make it a habit to clean our accessories promptly after use, setting the stage for another successful barbecue.
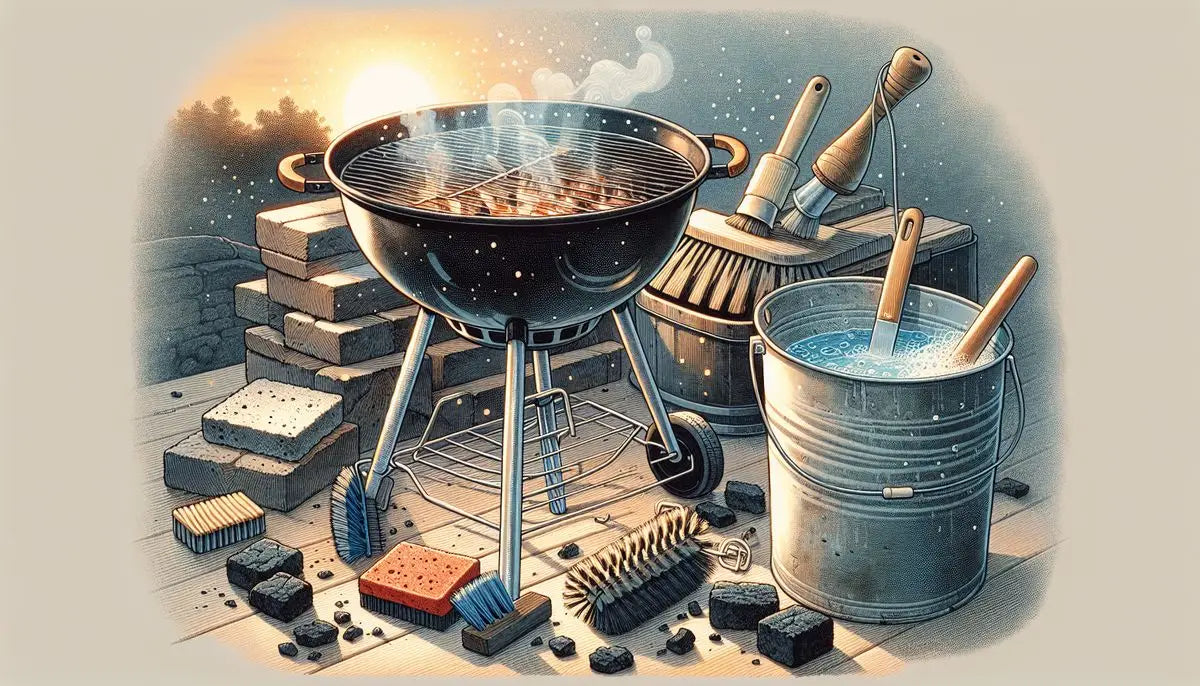
Cleaning Techniques for Charcoal Grills
The Right Tools for the Job
Having the right tools at our disposal can make the post-grill clean-up process not just bearable, but surprisingly efficient. A high-quality grill brush is indispensable for tackling stubborn food residue. We also recommend a pair of durable gloves to protect our hands from heat and grease.
Scrapers and cleaning sprays designed specifically for grills can help in removing the tougher grime without damaging the grates. Here's a quick list of essentials we should always have on hand:
- Grill brush or scraper
- Protective gloves
- Cleaning spray or degreaser
- Disposable aluminum trays for ash collection
Remember, investing in quality cleaning tools not only makes the job easier but also prolongs the life of our grill.
By keeping these tools readily available, we ensure that our post-barbecue clean-up is a smooth and swift operation, setting us up perfectly for the next grilling session.
Scrubbing the Grates: Methods and Materials
After a satisfying cookout, we know the importance of keeping our grill grates clean for the next round of barbecuing. The key to effective grate cleaning is using the right tools and materials. We prefer a stiff wire brush for its ability to scrape off stubborn food particles and grease. However, for those with porcelain-coated grates, a softer brass brush is recommended to avoid damaging the surface.
Grill brushes come in various shapes and sizes, but we've found that brushes with a long handle provide better leverage and keep hands away from the heat. Here's a quick list of materials we suggest having on hand:
- Stiff wire brush (or brass brush for porcelain grates)
- Grill stones or pumice blocks
- Dish soap or grill cleaner
- Warm water
- Sponge or scouring pad
Remember, always allow the grates to cool down before attempting to clean them. This not only ensures safety but also prevents warping of the metal.
Once the grates are cool, we start by removing the largest debris with the brush. Then, we create a soapy mixture with warm water and dish soap to soak the grates, making it easier to scrub off any remaining residue. For a deep clean, we sometimes use a grill stone, which can effectively remove rust and encrusted grime without the need for harsh chemicals.
Disposing of Ash Safely and Responsibly
After a satisfying cookout, we must ensure that the disposal of ash is done with care. Allow the ash to cool completely before attempting to remove it. This is crucial to prevent any accidental fires or burns. Once cooled, we transfer the ash to a metal container with a tight-fitting lid; this is to contain any residual embers that may still be present.
Ash disposal is not just about safety; it's also about environmental responsibility. Here's a simple guide to follow:
- Ensure the ash is cold to the touch.
- Transfer to a metal container with a lid.
- Dispose of the ash in a non-combustible area or add it to your compost if appropriate.
Remember, ash can be beneficial for your garden as it contains potash and other minerals that help plants grow. However, make sure it's free from any lighter fluid or other chemicals before using it as a fertilizer.
Lastly, check with local waste management regulations to confirm the correct disposal method for your area. Some regions have specific guidelines for the disposal of charcoal and ash due to environmental concerns.
Maintaining Grill Components
Caring for Cast Iron and Stainless Steel Surfaces
We know that the longevity of our grill greatly depends on how well we maintain its components, especially the cooking surfaces. Cast iron grates require regular seasoning to maintain their non-stick properties and prevent rust. After each use, we make sure to clean them while they're still warm, using a brush to remove any food particles. Then, we apply a thin layer of cooking oil, heating the grates slightly to help the oil bond to the surface.
For stainless steel, we use a gentler approach. A soft cloth or sponge with warm soapy water is usually enough to keep the surfaces clean. It's important to dry them thoroughly to prevent water spots and rusting. Occasionally, we'll use a specialized stainless steel cleaner to restore the shine, making sure to follow the grain of the metal for the best results.
Proper maintenance not only ensures our grill is ready for the next cookout but also extends its life significantly. Here's a quick checklist we follow:
- Clean cast iron grates while warm
- Season with cooking oil after cleaning
- Use warm soapy water for stainless steel
- Dry thoroughly to prevent rust
- Polish with stainless steel cleaner as needed
Remember, taking care of your grill's surfaces after each use will save you time and effort in the long run, and keep your grill performing at its best.
Protecting Your Grill from Rust and Wear
After a satisfying cookout, we must turn our attention to protecting our grill from rust and wear. The longevity of our grill is paramount, and taking proactive steps can ensure it remains in top condition for years to come.
Firstly, it's essential to keep the grill dry. Moisture is the enemy of metal and can lead to rust, so we always make sure to wipe down any surfaces that may have come into contact with water or marinades. Here's a simple checklist to follow after each use:
- Dry all surfaces thoroughly
- Apply a light coat of cooking oil to cast iron components
- Inspect for any signs of wear or damage
- Cover the grill with a weather-resistant cover
Additionally, we should regularly check for any loose parts or hardware that may need tightening. A well-maintained grill not only performs better but also safeguards our investment.
Remember, a little effort after each barbecue goes a long way in preventing rust and maintaining the pristine condition of our grill.
Seasoning Your Grill for Longevity
After each cookout, we take the time to season our grill, ensuring it remains in top condition for years to come. Seasoning is not just for cast iron pans; it's crucial for your grill too. By coating the grates with a high-smoke point oil and heating the grill to a high temperature, we create a non-stick surface that also protects against rust.
To properly season your grill, follow these simple steps:
- Clean the grill grates thoroughly.
- Apply a thin layer of high-smoke point oil.
- Heat the grill to around 400°F for about 10-15 minutes.
- Allow the grill to cool before storing.
Remember, a well-seasoned grill not only improves the flavor of your food but also makes post-grill clean-up easier. Regular seasoning after cleaning will maintain the integrity of the grates and prevent rust formation.
By incorporating this practice into our post-grill routine, we're investing in the longevity of our equipment. It's a simple yet effective way to ensure that our grill is always ready for the next barbecue adventure.
Storage Solutions for Grilling Gear
Proper Storage of Charcoal and Starters
After a satisfying cookout, we must ensure that our charcoal and starters are stored correctly to maintain their quality for the next grilling session. Proper storage is crucial to prevent moisture from rendering them ineffective. We always recommend keeping charcoal and starters in a cool, dry place, away from direct sunlight and any flammable materials.
Charcoal, especially, should be kept in an airtight container to protect it from humidity. Here's a simple list to help us remember the key points:
- Store in a cool, dry place
- Keep away from flammable materials
- Use an airtight container for charcoal
By adhering to these storage principles, we not only preserve the integrity of our grilling essentials but also ensure a safer environment in our storage areas.
Organizing Grilling Tools and Accessories
After a satisfying cookout, we know the importance of keeping our grilling tools and accessories in order. Proper organization not only makes our grilling experience more efficient but also extends the life of our equipment. We recommend designating a specific area or storage container for all your grilling tools. This can be as simple as a shelf in the garage or a dedicated storage bin.
Accessibility is key when organizing your tools. We like to sort our tools by frequency of use, ensuring that the most commonly used items are within easy reach. Here's a simple list to help you get started:
- Tongs and spatulas at the front
- Brushes and cleaning tools next
- Skewers and thermometers in a separate compartment
Remember, the goal is to avoid clutter and maintain a system that allows for quick retrieval and return of tools. We've found that using hooks or magnetic strips for hanging tools can be incredibly helpful.
Keeping your grilling tools clean and organized not only saves time but also prevents the frustration of searching for the right utensil when you're ready to grill again.
Lastly, consider the use of 100% natural, sustainable Firelighters for a superior BBQ experience. These ethically sourced starters are easy to use, odorless, and safe, ensuring that the flavor of your food is enhanced without unwanted tastes or smells.
Covering and Protecting Your Grill from the Elements
After a satisfying day of grilling, we mustn't forget the crucial step of protecting our grill from the harsh elements. Covering your grill is essential to prevent moisture, dirt, and debris from causing damage. A quality grill cover should be water-resistant, fit snugly, and have a soft lining to avoid scratching the grill's surface.
Durability is key when selecting a grill cover. Look for materials that can withstand sun exposure, rain, and snow without cracking or fading. Here's a quick checklist to ensure your grill stays in top condition:
- Measure your grill to find the perfect cover size.
- Choose a cover with adjustable straps or drawstrings for a secure fit.
- Opt for covers with air vents to prevent condensation and rust.
Remember, a little effort now in covering your grill can save a lot of time and money on future maintenance or replacements.
Prepping for the Next Barbecue
Restocking Charcoal and Consumables
After a successful barbecue, we always make sure to restock our charcoal and consumables. This ensures that we're ready to fire up the grill at a moment's notice. Keeping an ample supply of charcoal is crucial for maintaining consistent cooking temperatures and achieving that perfect sear.
Charcoal isn't the only thing we keep an eye on; lighter fluid, matches, and any other starters are just as important. Here's a quick checklist we use to keep track:
- Charcoal briquettes or lump charcoal
- Lighter fluid or natural fire starters
- Matches or a long-reach lighter
- Aluminum foil
- Drip pans
By maintaining a well-stocked grilling station, we avoid last-minute runs to the store and can focus on what we love most – grilling.
A Checklist for Grill Readiness
Before we fire up the grill for our next barbecue, we always run through a quick checklist to ensure everything is in place for a smooth grilling experience. Having a checklist helps us avoid any last-minute surprises and ensures we can focus on the joy of grilling.
- Inspect the grill for cleanliness and any necessary repairs.
- Confirm that all grilling tools are clean and within easy reach.
- Check the supply of charcoal and make sure it's dry and ready to use.
- Ensure that the lighter fluid or starters are fully stocked.
- Verify that the grill grate is properly seasoned and free of rust.
By adhering to this checklist, we not only prepare for an immediate cookout but also maintain the longevity and performance of our grill. It's a simple practice that pays off in the long run.
Ensuring a Quick and Easy Set-Up
To ensure a quick and easy set-up for our next barbecue, we've developed a streamlined process that guarantees we're ready to grill at a moment's notice. Preparation is key, and by keeping our grilling area organized, we can avoid any unnecessary delays.
Checklists are invaluable in maintaining our readiness. Here's a simple one we adhere to:
- Ensure all grilling tools are clean and in their designated spots.
- Verify that the grill is covered and protected from the elements.
- Confirm that charcoal and starters are fully stocked and easily accessible.
By dedicating a few minutes to this routine after each cookout, we not only make our next grilling experience more efficient but also more enjoyable. This practice helps us avoid the frustration of last-minute scrambles for supplies or equipment.
Remember, a well-maintained grill is a sign of a true pitmaster. Let's keep the spirit of barbecue alive by being prepared and eager for the next gathering around the grill.
Conclusion
Wrapping up a delightful charcoal grilling session with an efficient clean-up routine is essential for maintaining your grill and ensuring a hassle-free experience the next time you fire it up. By following the practical tips outlined in this article, you can streamline the post-grill clean-up process, making it less of a chore and more of a quick, satisfying finish to your outdoor cooking. Remember to dispose of ashes safely, clean the grill grates while they're still warm, and give your grill a proper inspection after each use. With these efficient wind-down strategies, you'll be ready to enjoy many more memorable barbecues with friends and family.
Frequently Asked Questions
What is the best way to inspect my grill for residual charcoal and ash?
After the grill has cooled down, carefully remove the grates and use a grill brush or scraper to check for and remove any leftover charcoal and ash. Make sure to dispose of the ash in a metal container once it's completely cool.
How can I effectively clean food particles off my grill grates?
Preheat the grill for about 15 minutes to loosen the particles, then use a grill brush to scrub the grates clean. For stubborn residue, soak the grates in warm, soapy water before scrubbing.
What should I do to maintain my grill accessories?
Clean your grill accessories with warm, soapy water after each use. Dry them thoroughly to prevent rust and store them in a dry place.
How do I properly dispose of charcoal ash?
Allow the ash to cool completely, then transfer it to a metal container. You can dispose of it in the trash or use it as a fertilizer in your garden if it's free of chemical additives.
What's the best way to store my charcoal and starters?
Keep charcoal and starters in a cool, dry place, away from direct sunlight. Use airtight containers to prevent moisture from affecting the charcoal and starters.
How should I cover and protect my grill when it's not in use?
Use a grill cover that fits snugly over your grill to protect it from the elements. Make sure the grill is cool and clean before covering it.