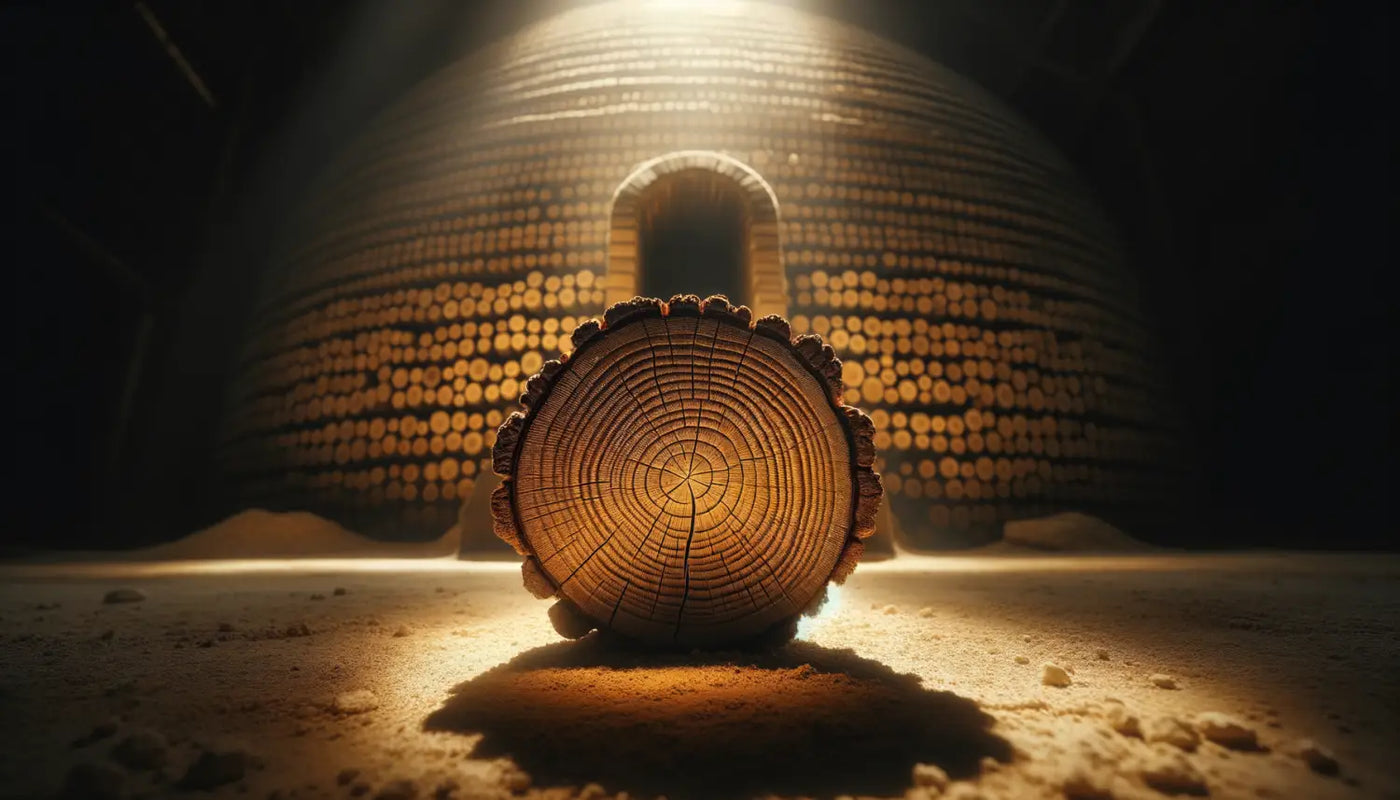
Introduction to Kiln Drying
Woodworking is an art that relies heavily on the quality of the material used. One of the most critical steps in ensuring the quality of wood is the drying process, which stabilizes the wood, reducing the likelihood of issues such as warping, cracking, and rotting. Kiln drying is a controlled method of wood drying which accelerates the removal of moisture from wood.
The Importance of Drying Wood
Drying wood is crucial for several reasons:
- Stability: Dry wood is less prone to changing shape and size with fluctuations in humidity.
- Durability: Properly dried wood is more resistant to decay and insect attacks.
- Weight: Removing moisture makes wood lighter and easier to transport and work with.
- Adhesive and Finish Application: Dry wood allows for better adhesion of glues and more even application of stains and finishes.
Overview of Kiln Drying Process
Kiln drying uses heat and airflow to rapidly remove moisture from wood, a process that can be finely controlled to achieve a specific moisture content. The basic stages include:
- Loading: Wood is stacked and loaded into the kiln.
- Heating: Temperature is gradually increased to allow for uniform drying.
- Humidity Control: Humidity levels are adjusted to control the rate of drying.
- Cooling: The wood is gradually cooled to avoid stress.
- Conditioning: A final stage to equalize moisture content throughout the wood.
Kiln drying is faster than traditional air drying, and by controlling the temperature and humidity, it's possible to minimize defects that can occur during the drying process.
Characteristics of Oak Wood
Oak is a popular choice for furniture, flooring, and cabinetry due to its durability and appealing grain pattern.
Understanding Oak Wood's Properties
Oak wood is known for its:
- Strength: Oak is a hard and strong wood, making it ideal for structures that require support.
- Texture: Oak has a pronounced grain, which contributes to its aesthetic appeal.
- Workability: Despite its hardness, oak wood is relatively easy to work with when it has been properly dried.
- Variability: Oak comes in various species, each with unique characteristics and moisture contents.
Why Kiln Drying is Essential for Oak Wood
Oak wood particularly benefits from kiln drying because:
- Moisture Content Control: Oak can have a high initial moisture content, and kiln drying can bring it down to a workable level.
- Preventing Defects: Oak's dense structure makes it susceptible to cracking during drying; a controlled environment minimizes these risks.
- Efficiency: Oak takes a long time to air dry; kiln drying significantly speeds up the process.
By ensuring that oak wood is kiln dried, woodworkers and consumers can enjoy the full beauty and functional benefits of this versatile hardwood. Whether for constructing sturdy furniture, creating beautiful floors, or crafting detailed joinery, the importance of starting with well-dried wood cannot be overstated. For more information on the types of wood suitable for various projects, including kiln-dried options, be sure to check out the HSWF collections of kiln-dried wood. Additionally, understanding the basics of kiln drying can further deepen one's appreciation of the woodworking process, which is detailed in this comprehensive guide.
Preparing Oak Wood for Kiln Drying
Before you can enjoy the benefits of oak wood in your furniture, flooring, or joinery projects, it is essential to ensure that it has been properly prepared and dried. This is where kiln drying comes into play, a crucial process that can make or break the quality of your oak wood.
Selecting the Right Oak Lumber
The process begins with the selection of the right type of oak lumber. Oak is a hardwood with a reputation for strength, beauty, and durability, making it an excellent choice for various applications. When selecting oak for kiln drying, consider the following:
- Grain Pattern: Decide on the grain pattern that suits your project. Whether you prefer straight grain or a more varied pattern, this will affect your choice of lumber.
- Grade of Wood: Lumber is graded based on the number of defects present. Select a grade that matches the quality needed for your project.
- Wood Source: Make sure the oak has been responsibly sourced. Sustainable forestry practices are not only good for the environment but also can affect the lumber's quality.
It's also vital to consider the lumber's initial moisture content. Freshly cut oak can have a high moisture content, around 80% or more, which will need to be reduced significantly to prevent issues such as warping, shrinking, or cracking later on.
Proper Stacking and Storage Pre-Kiln
Once you have selected the oak lumber, it's crucial to stack and store it correctly before kiln drying. These steps will help to prevent damage and prepare the wood for the drying process:
-
Sticker Placement: Place thin strips of wood, known as 'stickers', between each layer of boards. The stickers should be uniform in thickness and aligned vertically to allow for consistent airflow around the lumber.
-
Stacking: Stack the oak boards flat to prevent warping. Ensure the stickers are placed at regular intervals to promote even drying.
-
Protection: Keep the stacked wood protected from the elements but allow for air circulation. A shed or covered area works well.
-
Elevation: Elevate the stack from the ground to prevent moisture from the soil from affecting the lumber.
-
Weighting: In some cases, placing a weight on top of the stack can help to keep the boards flat and prevent warping.
By paying attention to these stacking and storage details, you can minimize the risk of defects in your oak wood before it even enters the kiln.
Setting Up the Kiln
The setup of the kiln is just as crucial as the preparation of the wood itself. The type of kiln and the conditions within it must be suitable for drying oak to achieve the best results.
Types of Kilns Suitable for Oak Wood
Oak wood requires a specific type of kiln to dry effectively. The common kilns used for oak are:
-
Conventional Kilns: These kilns have been used for decades and are known for their reliability. They work well with oak, allowing for precise temperature and humidity control.
-
Dehumidification Kilns: These are energy-efficient and work by removing moisture from the air inside the kiln. They are suitable for smaller operations.
-
Vacuum Kilns: These kilns dry wood at lower temperatures under a vacuum, which can speed up the drying process without causing the damage that high heat might.
- Solar Kilns: Solar kilns rely on the sun's energy, making them the most environmentally friendly option. They are, however, dependent on weather conditions and are less precise.
Ideal Conditions for Kiln Drying Oak
The conditions within the kiln must be carefully controlled to ensure the oak dries evenly and to the right moisture content. Here are the ideal conditions for kiln drying oak wood:
-
Temperature: The temperature should be raised gradually. Start at a lower temperature of around 35-40°C and slowly increase it to 65-80°C as the wood dries.
-
Humidity: Proper humidity levels are vital to prevent the oak from drying too quickly and developing cracks. Humidity should be adjusted in relation to the temperature and the drying stage of the wood.
-
Air Circulation: Good air circulation is essential for even drying. Fans should be used to create a consistent flow of air within the kiln.
- Drying Time: The time it takes to dry oak wood can vary depending on the initial moisture content and the thickness of the boards. It's a process that cannot be rushed without compromising the quality.
By setting up the kiln with the correct conditions and carefully monitoring the process, you can ensure that your oak wood dries properly, providing a stable and beautiful material for your projects. Remember to refer to the manufacturer's guidelines and consult with drying experts to optimize your kiln setup.
The preparation and setup stages are foundational to successful kiln drying of oak wood. It's important to take the time to do it right, setting the stage for a process that enhances the wood's natural strength and beauty. For further insights on the importance of the drying process, check out the detailed guide on basics of kiln drying and explore various wood fuels including kiln-dried wood for understanding the final product quality.
The Kiln Drying Process
When it comes to transforming oak wood into a stable and usable material, the kiln drying process is a critical step. It's not just about reducing the moisture content; it's about doing so in a controlled and efficient manner to preserve the integrity of the wood.
Step-by-Step Guide to Drying Oak in a Kiln
Kiln drying oak wood is a delicate process that requires careful attention to detail. Here's a step-by-step guide to ensure you get the best results:
-
Preparation: Before you even begin kiln drying, make sure the oak wood has been properly prepared. This includes ensuring it's been correctly stacked and that the moisture content is at an appropriate level for kiln drying to begin.
-
Loading the Kiln: Place the oak wood inside the kiln, spacing the boards out to allow for adequate air circulation. Use stickers, which are small pieces of wood placed between the layers of boards, to maintain even spacing.
-
Setting the Kiln Conditions: The kiln should be set to the ideal conditions for oak, which typically means a temperature range of 65-80 degrees Celsius. Humidity levels should also be set to prevent the wood from drying too quickly and causing cracking or warping.
-
Initial Drying Phase: Start with a lower temperature to allow the wood to begin drying without shocking it. This helps prevent surface checking and other defects.
-
Middle Drying Phase: As the wood begins to dry, gradually increase the temperature and decrease the humidity in the kiln. This is a balancing act that depends on the initial moisture content and the thickness of the wood.
-
Final Drying Phase: Towards the end of the drying process, closely monitor the wood's moisture content. Once it approaches the target level (usually between 6-8% for oak), start preparing to condition the wood.
-
Conditioning: This is the process of equalizing the moisture content throughout the wood pieces to reduce internal stresses.
-
Cooling Down: Once the desired moisture content is achieved, it's important to slowly cool down the kiln and allow the wood to acclimate before removing it.
-
Unloading the Kiln: After the wood has cooled and stabilized, carefully unload it from the kiln. Inspect the wood for any potential issues that may have arisen during the drying process.
Throughout these steps, it's crucial to maintain detailed records of temperatures, humidity levels, and moisture content readings to optimize the kiln drying process for oak wood.
Monitoring Moisture Content
Oak wood's moisture content is the most vital aspect to monitor during kiln drying. Here are some essential pointers for this stage:
- Use a reliable moisture meter to take readings from several boards and at different depths. This will give you an accurate understanding of the overall moisture content.
- Record these readings regularly and adjust the kiln settings as necessary to regulate the drying process.
- Pay particular attention to the moisture gradient – the difference in moisture content between the shell and the core of the wood. A significant gradient can lead to stresses that cause warping or cracking.
Troubleshooting Common Kiln Drying Issues
Kiln drying oak can come with a few common problems. Here are solutions to some typical issues:
- Warping: If the oak boards begin to warp, it may be a sign that the drying is too rapid or uneven. Adjust the kiln's humidity or temperature to correct this.
- Cracking: Developing cracks can indicate that the outer layers of the wood are drying too quickly. Lowering the temperature and raising the humidity can help mitigate this problem.
- Internal Stresses: These are often the result of a too rapid drying process or an uneven moisture gradient. Conditioning the wood at the end of the drying cycle can alleviate these stresses.
By addressing these issues promptly, you can ensure the quality of your kiln-dried oak wood is maintained throughout the drying process.
Post-Drying Practices
After the kiln drying process is complete, it's essential to handle the oak wood with care to preserve its quality.
Conditioning the Oak Wood
Conditioning is the process of equalizing the moisture distribution within each board. To condition oak:
- Maintain a higher humidity level in the kiln for a period after the target moisture content has been reached.
- This allows the moisture to move from the wetter core to the drier outer areas, minimizing the risk of stresses and resulting defects.
Post-Kiln Storage and Handling
Proper storage and handling after kiln drying are as important as the drying process itself. Here are some tips:
- Store the kiln-dried oak in a dry, well-ventilated area to prevent reabsorption of moisture.
- Handle the wood gently to avoid damaging the surface, which can be more brittle after drying.
Following these steps will help ensure that the high-quality oak wood, which you've carefully dried, remains in excellent condition, ready for crafting into beautiful and durable wood products.
As you master the art of kiln drying oak wood, consider exploring our collection of kiln-dried wood to see the results of expertly dried hardwood. For those interested in a deeper dive into the technicalities of kiln drying, the step-by-step kiln drying guide provides additional insight.
Finishing Oak Wood After Kiln Drying
Once your oak wood has been thoroughly kiln-dried, it's not yet ready to be transformed into that stunning piece of furniture or robust flooring. There's a crucial phase that comes next: finishing. This stage is essential to bring out the natural beauty of the oak and to ensure it's protected and durable for years to come.
Sanding and Planing Considerations
Before any finish can be applied, the wood must be smooth and free from any rough spots that could detract from its appearance or cause issues when applying a sealant or stain. When sanding oak wood, it's important to start with a coarser grit sandpaper and gradually work your way to a finer grit:
- Start with 80-grit sandpaper to remove any major rough spots.
- Progress to 120-grit to begin smoothing the surface.
- Finish with 220-grit sandpaper for a silky smooth finish.
It's also key to sand in the direction of the grain to avoid scratches that can be accentuated by the finishing process. When planing, ensure your tools are sharp and set to take off only thin layers at a time to avoid creating gouges or uneven surfaces.
Finishing Options for Oak Wood
Oak's open grain structure lends itself well to a variety of finishes. Here are some popular options:
Oil finishes – such as Danish or Linseed oil – penetrate deep into the wood, enhancing its grain and offering a warm, natural look. Oils are easy to apply but may require more frequent maintenance.
Varnishes and lacquers provide a durable and protective coat with a glossy or matt finish. They're more resistant to water and other elements but can be more challenging to apply evenly.
Stains can be used if you wish to alter the color of the oak. They should be applied before any oil or lacquer and can range from light tints to dark tones.
Waxes offer a more natural finish and can be applied over oils for added protection and shine. They require more frequent reapplication but are simple to work with and provide a pleasant tactile finish.
Keep in mind that each finish may require a different application process and curing time. Always follow the manufacturer's instructions for the best results.
Benefits of Properly Dried Oak Wood
Kiln drying oak wood isn't just a procedural step; it comes with a host of benefits that are significant for both builders and end-users.
Enhanced Strength and Durability
The controlled environment of a kiln ensures that the oak wood dries evenly and reduces the risk of internal stresses. This process strengthens the wood and helps prevent future warping, cracking, or splitting, leading to a more durable final product. The reduced moisture content also makes the wood less susceptible to fungal attacks and decay.
Improved Aesthetic Appeal
Kiln drying helps to preserve the natural color and grain patterns of oak wood. When finished, the wood has a richer and more consistent color, enhancing its natural beauty. It also becomes a better canvas for stains and finishes, which are absorbed more evenly on properly dried wood.
Conclusion
Recap of the Oak Wood Drying Process
In summary, drying oak wood in a kiln is a methodical process that involves preparing the wood, setting up the kiln to the ideal conditions for oak, closely monitoring the drying process, and then finishing the wood post-drying. This comprehensive approach ensures that the wood is optimized for strength, durability, and aesthetic appeal.
Final Thoughts on the Benefits of Kiln Drying Oak Wood
By understanding the entire process, from selection to the final finish, you can appreciate the true value of kiln-dried oak wood. Not only does it offer a superior material for construction and woodworking projects, but it also provides an end product that stands the test of time. Whether you're a hobbyist or a professional craftsman, recognizing the importance of each step in kiln drying can lead to higher quality creations that showcase the beauty and resilience of oak.
For more insights on wood drying and fuel options, explore our collections of kiln-dried wood, Swedish fire logs, firelighters, and hardwood ash logs, or delve into our informative blog posts for more expert advice on working with wood.